
Settings: Ambient is around neutral grey, with the flash modeling light one stop over neutral grey.
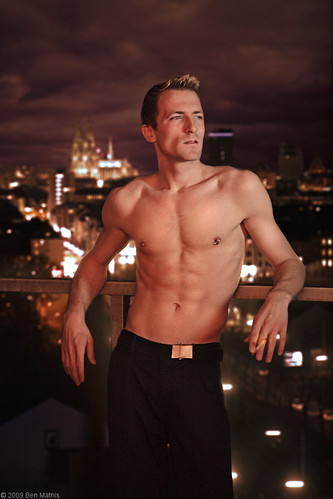
This is my friend Sebastian. He told me he had an awesome balcony with a view of the city of Cologne, and he wasn't lying. While visiting with him, he went out to smoke, and it gave me this really cool vibe of him out there, and I felt like doing a Marlboro man-esque shoot with him there.
I knew before the shoot it was going to be difficult. The city is way in the background, so keeping them both in focus even on a bright day would be hard, at night even harder. Even just letting in enough light for proper exposure was an ordeal. This was taken at ISO 1600, F/1.8, and 1/30 of a second on an 85mm lens. The light was so low, using the flash was out of the question, so this is just the modeling light from the Quadra, a 20 watt LED that is daylight balanced.
I used the softbox without the inner baffle to let through as much light as possible, but used the fabric grid to restrict the light to his face, with some falloff towards the body. To get a good balance, the light is about 2 meters from his face on the right. Then I turned on the lights inside his flat, which were tungsten bulbs, to provide some fill, that's where the orangeish light is from.
With the camera cranked to maximum light gathering mode, I was able to properly grab an exposure of him with the city. The only problem is that the city was super blurry from the 1.8 aperture. I solved this by moving him and taking another photo of the city in focus, so I could blur to taste in Photoshop with the lens blur filter. I wanted a little blur to isolate him as the subject, but not so much that the church was unrecognizable. By masking him out first, I was able to blur to the exact amount I wanted, which was not much. I'd say this is the equivalent of the same photo at f/8 or so, which would have required a camera with iso 12,800 or so.
In post I first did some body editing, using liquify to change the profile, and dodge/burn to sculpt in more muscles. Then I masked him out, quickly with the magic lasso tool, then cleaned up with the brush using a layer mask. I added clouds to the background from another shoot, since the sky was empty, collapsed it, then blurred the collapse layer, blending the skyline and clouds perfectly. Then I used my masking trick from this post: http://mr-chompers.blogspot.com/2009/08/maskingtrick.html to blend the border of him in so it wasn't so obvious he'd been cut out.
Here you can see the stages of editing. The final stage is multiple small things, from enhancing the intensity of the cigarette, to adding some fresnel glow on his silhouette to imply the city lights, to the masking trick, high pass sharpening, and a final color grading to unify it all.

