
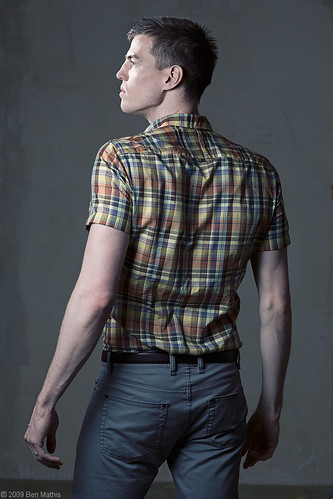
Settings: Ambient is at -3 stops below neutral grey. One flash into a large silver umbrella off frame left at +1 stop above neutral grey. One flash with a gridspot aimed just at the face, outside frame left and slightly behind the subject at +2 stops.
Nothing like a new outfit to inspire a portrait session. Here's the setup shot:
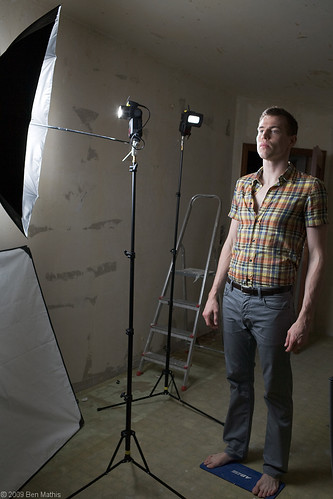
Really simple, but the one little twist is the head only rim light. This pulls focus to the face, which is important in a composition like this, where nothing falls on a natural point of power. Without the gridspot, it would have rim lit the whole portrait, which would have been too contrasty and harsh.
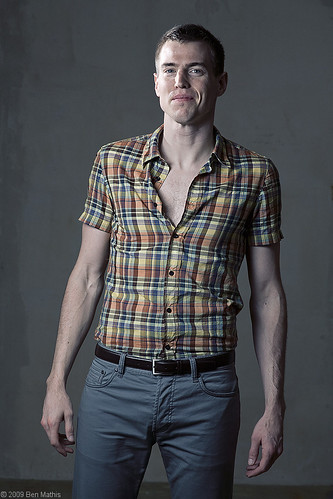
This is also a powerful lighting setup that allows for a lot of model movement. Here is a front facing pose with the same lighting.
The only thing I'd like to change, is that the rim is just a bit too harsh. An 8" reflector with a honeycomb grid would have been perfect. It would have had a smoother falloff into the soft area of the face, rather than the hard edge it has now. The subtlety would have enhanced the lighting on the face.
Having the background quite far behind the subject allowed me to use an aperture of 6.3 for razor sharpness and a fully focused figure, with a slightly blurry background to make sure the focus fell completely on the figure. The far away background also allowed it to fall into a very dark grey. The light sources are so close to the subject, by the time they reached the background, they are much dimmer, giving a natural lighting ratio.
Post was very simple. I used a gradient map layer, with neutral grey as the light and dark area, but with a greenish blue transition area, and a purple blue shadow area. This way I could tone the transition from light to dark with a slight blue, and then the very start of the shadows are purple. The gradient map layer was then put to overlay mode. For more info on gradient maps, use this tutorial. (from my 3d site) Then I made a solid color layer, a very light cream color, put it on screen mode, and then backed it off to 5%. This makes everything a bit smoother and less digital feeling. I then used my standard sharpening procedure, masking out areas that looked too harsh.


