Monday, June 29, 2009

light, shadow, and specularity

light, shadow, and specularity
Want full control over the light and shadows in your photography? Understanding how light works is necessary, and this paper will attempt to explain how to affect the lighting, shadow quality, and apparent shininess of your subject.


This tutorial is geared toward both 3D artists and photographers. There will be times when I need to make a technical explanation that won't make sense to one group. I'll try to use terms that both groups will understand. All units will be in metric.In this explanation, we're going to focus on the two most important objects in a photo, or a 3d rendering. The light source, and the subject. All explanations will be assuming one light, as it applies to multiple lights identically.


The light source has 4 properties that affect the lighting of the scene.
  1. Apparent size
  2. Distance from subject
  3. Intensity (brightness)
  4. Color temperature

The subject has 2 properties
  1. Surface reflectivity
  2. Surface roughness

We can affect the way the light interacts with the subject, by knowing how these 6 properties interact.
  1. Shadow edge softness
  2. Width of the penumbra (area where light transitions to dark, sometimes called the terminator)
  3. Brightness of specular highlights
  4. Falloff from full light intensity to complete darkness


Light Source
All of the light sources properties are inter related, except the color temperature, which is independent of the other 3.

  • Apparent size
One must specify apparent size, rather than actual size. The sun is humongous, but it's apparent size is quite tiny. A 30x40 cm softbox is considered XX Small, but if it's right next to your face, it's apparent size is large. You can "modify" a light source with a light modification. An umbrella, a diffusion panel, or a softbox are all examples of lighting modifiers. When I refer to the size of the light source, I'm meaning the last surface between the original light source, and the subject. If you put a big translucent diffusion panel in front of the direct sunlight, now the diffusion panel is your light source, not the sun.

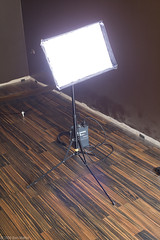
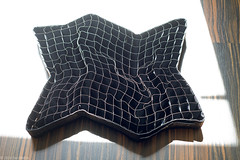
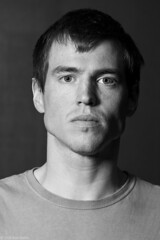
As an example. Here is a softbox very close to my good friend, Klaus Nomi:


And the view from his perspective:


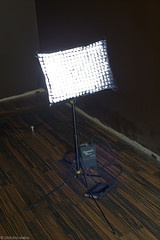
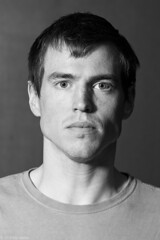
now I move the softbox further away:


Now look from his perspective:


Notice how in the last image, the softbox appears much smaller? That is because it has been moved further away. It's apparent size (to the subject) is smaller. The way to keep it's apparent size the same when moving it away, is to increase the size of the light source. In photography, you use a diffusion panel, an umbrella, or a softbox, and just select a larger size than you were using when it was in close.
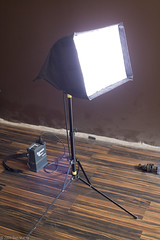
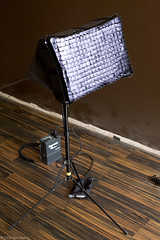
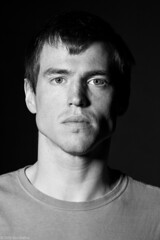
Larger softbox:


From his perspective:


By increasing the size of the light source, I've kept it's apparent size the same, despite increasing the distance from light source to subject.

  • Distance from Subject
The physical distance from the light source, and the subject. Light works based on the Inverse Square law. If you double the distance between subject and light source, the amount of light reaching the subject will be a quarter what it was. If you halve the distance, the amount of light will be quadruple what it was.

There is a property of light that does not adhere to inverse square, and I will get to that under surface reflectivity. The brief version is that no matter the light's distance from the subject, the brightness of the reflection of the light source stays the same, only the size of the reflection changes.

  • Intensity
The brightness of the light reaching the subject. This can me measured in Lumens, Candelas, Watt Seconds (not an actual brightness measurement, but a reference to the power being used by the flash

  • Color Temperature
Simply, the color of the light. Tungsten bulbs are orange colored. Fluorescent bulbs are greenish. Halogens can be blue or warm. The sun is a bit yellow, the open sky is a bit blue. Most flashes are neutral, but "hot lights" are warm. Sodium Vapor lights (street lights) are the worst, as they are extremely orange, and emit almost no blue wavelengths of light. Most light sources can be corrected for, so that they appear neutral. Add blue, and a orange light becomes white. Add magenta, and a green light becomes neutral. Sodium vapor however, cannot be corrected for to get neutral colors. The easiest way to correct the light, is to photograph something that is neutral in color (a grey card, or a piece of white paper) under that light source. Most photo editing software will allow you to "pick" from this neutral area, and it will subtract any color tint it perceives. This is why it's necessary to use something without color in itself, so that only the color of the light will be present.


Subject
Both the subject's reflectivity and roughness are highly inter related.

  • Surface Reflectivity
A mirror is 100% reflective. The only thing 100% non reflective is special carbon nano fiber fabrics, but for all intents and purposes, the less "wet" or oily a surface is, the less reflective it is. A human eye is highly reflective, as is a wine bottle, a billiard ball, sunglasses, and metal buckles. Most fabric has low reflectivity, as does paper, and rust. Most things fall somewhere between. Human skin, because it is covered in tiny drops of oil, has reflectivity, most plastic is slightly reflective, as is rubber, leather, and rocky surfaces. All surfaces start with a default reflectivity, but it can be altered. Human skin can be either cleaned, or have powder makeup applied to reduce it's reflectivity. Glass can be sprayed with non-reflective spray. Leather can have polish added. Conversely, you can make skin more reflective by adding oil, sweat, or water. Normally it's not a good idea to change the surface's reflectiveness just to change it's apparent shininess. If your model needs makeup, or you want to put water drops on a rose for aesthetic reasons, do so, but just adding powder or anti reflective spray is normally a lot more difficult than controlling the specular brightness, which we'll go into later.

  • Surface Roughness
The surface roughness can be anywhere from glass smooth, to rough like elephant skin. Human skin has texture and roughness, but it's fairly smooth. A wet sphere (like the human eye) is incredibly smooth. Glass vases are smooth, leather purses are a bit rough. Blue jeans are rough, metal is almost always smooth, unless it's brushed aluminum, or rusty. Surface roughness ties in very closely with surface reflectivity. Even if a surface is highly reflective, if it's rough, you will get a more scattered reflection.


Here is an illustration. On the left is a bowling ball. You get one specular highlight from the fact it's just a giant smooth ball. On the right, you have a bowling ball covered in marbles. Each marble has it's own specular highlight, because they make the surface rougher. This is exactly the difference between a smooth and a rough surface. You could also think of the difference between a smooth mirror-ball, and a disco-ball. Human skin has millions of tiny drops of oil, acting like these glass marbles. Black asphalt has tiny grains of sand and rock that are at different angles. A rough surface is essentially a faceted surface, so there is more than one non-contingent area that faces in each direction.


Some objects can have their roughness aligned in a certain direction. Think brushed aluminum, freshly-combed human hair, a Christmas ornament wrapped in thread, or a vinyl record. This roughness is referred to as anisotropy. It will affect the highlight in a way that runs along the rows of roughness. It's best to think of it like the human hairs. Thousands of tiny cylinders all roughly parallel to one another. Each hair has a normal specular like a cylinder, but when seen as a whole, you get a long, narrow highlight. If the exact same surface were perfectly smooth like a bowling ball, you'd get a specular hotspot the shape of the light source. It's the parallel roughness that causes anisotropy.

Example image: (notice how the smooth version is one continuous circle that fades out, the rough version is the same shape, but it's broken up into tiny chunks, the anisotropic turns it into a wide band that wraps around the sphere)

The
way the light interacts with the subject

The entire way the surface is revealed can be controlled by the photographer or render
artist by carefully selecting the appropriate settings.
All 4 properties of light, as well as the 2 surface properties, can be controlled to alter the way the light and subject interact. It's important to know how they interact, for when you desire a specific look for your photos or renders.

First, a quick rundown of the terms for the different parts of light, specularity, and shadow on an object:


The specular hotspot are the bright sharp images of the light source being reflected off the object. They are referred to as hotspots, because in most images, they are overexposed and show up as pure 255 white. The diffused light, is the area of the object being lit by the radial rays from the light source. The penumbra is the edge from where lit area changes to shadow area. This is where the roughness of an object will be most apparent. The shadow is the area not receiving any light from the light source. Unless illuminated by another light or bounce object, it will be completely black.


Shadow edge softness

The edges of the shadows can be razor sharp (like from the sun on a clear, non cloudy day) or super soft and smooth, like on a bright, but overcast day. The main property that controls this, is the apparent size of the light source. Larger apparent sizes create softer shadow edges, smaller apparent sizes create harder edges. The sun, a 3D point or spot light, a hotshoe flash, or a studio light used bare, will all produce completely sharp shadows. This is rarely desired, but when you do want a hard shadow edge, use a small light source. This section also applies to the penumbra, which is explained further into this tutorial.

Here is an illustration for hard edged shadows:


A small light source is binary. The surface of the subject can either see it, or it can't. If it can see it, it's lit. If it can't, it's in shadow. The small source means that the surface will move from lit to shadowed almost instantly, which is why the shadow edge is hard.

Here is an illustration of soft edged shadows:

This results in soft-edged shadows:


A large apparent light source is analog. There are parts of the surface that can see all of the light source, and thus receive rays of light from all of it, and there are parts that cannot see it at all. However unlike the point lights, there is also an area which can see parts of the light source. The less they see of the light source, the darker they will be, and the more they see, the lighter they will be. This gives you a gradient from the area that can see all the light source, to the area that can see none.

The smaller the apparent size of the light source, the harder the shadow edge, and the more it behaves like the point light example. The larger the apparent size of the light source, the softer the shadow edge will be.


Width of the penumbra (area where light transitions to dark, sometimes called the terminator)

The penumbra is controlled almost entirely by the apparent size of the light source. It's slightly affected by the roughness of the surface, and how gradually it turns away from the light. Smaller apparent light sources will create very narrow penumbras, and any surface roughness will be accentuated by all the micro shadows. Any small bumps or dents will have shadows cast. A polished sphere will have a very smooth penumbra since it is not rough, and it turns away slowly. A box has a very narrow penumbra because the surface angle changes suddenly a full 90 degrees, rather than smoothly turning away. Most faces behave like a sphere, and the penumbra should roll smoothly off, but skin with wrinkles or acne scars will show very strongly in the penumbra if your apparent light source is small.

The most flattering light for a rough surface, if you're trying to hide the roughness, is a large apparent light source. This will soften the micro shadows in the penumbra.

Brightness of specular highlights

One thing that has to be explained about specular highlights to truly understand them. Light radiating from an infinitely small point would have no specular hotspot. But all light is originated from something with a physical size; the sun, a flash tube, a light bulb, etc. Each point of this physical light source is casting light out radially. What this means is that there will be parallel rays traveling outwards in the shape of the light source.

The radial rays will fall off, because the further away you get, the more spread the light beams are, and an individual point will be receiving less of these rays. This is why the light "falls off" in an inverse square manner.
However the parallel rays do not fall off. Think of them as tiny lasers, aimed perfectly from the light source itself, onto the object, which then reflects it directly into your eye. Because the light rays are not traveling outwards radially, they maintain brightness regardless of distance. The only decay of the beam will come from the particles in the atmosphere itself, but for any realistic working distance, it will not be measurable.

This illustration shows a very simplified model of this behavior:


Because the light is traveling radially, closer objects get more of the rays, further ones get fewer. This is also why shadows are sharper at the base of an object (like near the feet of a person standing on the ground). Keep in mind that the bulb is there for stylization purposes. You don't actually see a perfect reflection of the light source unless the object is incredibly smooth and reflective. On most objects it just appears as a white shape that is the same shape and dimensions as the light source. (a softbox leaving a squarish shape, and an umbrella a circular shape)


Falloff from full light intensity to complete darkness
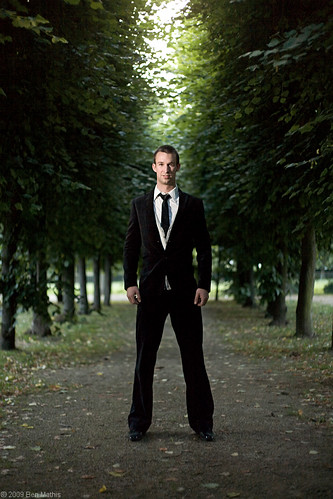
As mentioned above, light "falls off" in intensity. You can use this for control. If you put a light source extremely close to a face, by the time it reaches the person's shoes, it will be too dark to register on the sensor. As the distance from light source to subject increases, the less you can use this affect. Best to imagine the sun. Your feet are further from the sun than your head, but it's such a tiny fraction of the overall distance from the sun, that you will get no falloff. If you are 2 meters tall, and the light is 1 meter above your head, and properly bright to light your head correctly, it will be one quarter that brightness by the time it reaches your shoes. This can be used to create focal points where the eye is naturally drawn to.

summary
  • Unfocused light falls off inverse squarely. Double the distance, 1/4 the brightness. Half the distance, 4x the brightness.
  • Surface roughness determines how clearly the light source is reflected. Smooth surfaces give you the exact shape, rough surfaces give you a scattered shape.
  • Apparent size is what's important, not absolute size. A medium source 1 meter away is apparently larger than a giant source 50 meters away.
  • Apparent size of the light affects the softness of the shadow edge and penumbra. Larger apparent sizes make softer shadows and smoother penumbras, smaller sizes make sharper shadows and harsher penumbras.
  • Specular reflections do not fall off. They stay the same intensity regardless of distance. Lessening the reflectance of the surface, or making the apparent size of the light larger, is necessary to lessen the specular hotspot's intensity.
Link to google documents version.

Wednesday, June 24, 2009

know_thy_equipment

While looking at my previous shoot, my favorite image (the top image in the previous post) I noticed that I don't like the way the light falls on his face. It's an ok placement for rembrandt lighting, but the shadow edge is too hard. I've been thinking about the solution, and I believe it's twofold.

In the future, the further I must place the light away from the subject, the closer to loop lighting I will use. The closer I can place the light, the closer to rembrandt lighting I will use. As a general rule of course. Harder shadow edges seem to work better with loop pattern, and softer shadow edges work better with rembrandt. This is because rembrand pattern allows for a lot of islands of light that look too much like cutouts when they are hard edged. These shapes smooth out and soften with the same light mod moved closer (so as to appear larger to the subject). Loop pattern more evenly illuminates the front mask of the face, so you can get away with slightly harder shadows.

Also, I think it's just good to know your gear inside and out. So you can operate it transparently, spending all your time on taking photos, rather than fiddling with knobs and menus, and also so that you don't lose out on a good shot, for lack of familiarity. At this point I know my lenses, and the camera quite well, but since this is a new light modifier system, I am still learning it. I decided a series of scientific tests were in order.

First, the gear itself (this is also a mini-review):

This is the Chimera XXS (extra extra small) with silver lining. It's 30x40cm (12x16in) It has two baffles, inner and outter. It's super well made, easy to setup, and the rods are nice and sturdy, while being very springy and easy to insert.

softbox-6 softbox-7

This is the 20 degree fabric grid for the above softbox. It's expensive, but it's really well made, and it changes the light in a way you can't really get otherwise. It velcros into the front of the softbox, leaving no gaps, which is very nice. It collapses very small, and comes with a small velcro strip that holds it shut. It also comes with a small drawstring bag.

softbox-5 softbox-4 softbox-3

Here is the grid attached to the flash. notice how it blocks the light from the side.

softbox-1 softbox-2

At 2 meters, the grid restricts the beam to a 1.2 meter circle. At 3 meters, the beam is closer to 1.8 meters in size. It gives me a nice tight beam to put only on a person's face, which is how I prefer to light my environmental portraits.

For the test, my setup was:
  1. Matt on the ground to make sure subject is always in the same location.
  2. Camera on a tripod to ensure camera to subject distance stays the same.
  3. Measuring tape stretched from matt at 45 degree angle, to allow measurement of the light distance.
  4. Light moved from 1 meter, then 2 meters, then 3 meters from subject. Flash output adjusted to maintain proper exposure.
  5. One round with bare softbox, one round with 20 degree grid installed.
  6. Crop and process in Lightroom so exposure is the same for all, and in B&W so that the shadow edge and specular could really be visible.
In this first row, you see the bare softbox, no grid. First is 1 meter, last is 3 meters distance.

softbox-10 softbox-9 softbox-8

In this row, you see the softbox with the 20 degree grid. First is 1 meter, last is 3 meters distance.

softbox-11 softbox-12 softbox-13

They really have to be examined both at this small size, as well as in large full size to appreciate the differences. It might appear to be pixel peeping, but when comparing the 1 meter, directly to the 3 meter, there is a definite softness to the 1 meter that the 3 meter lacks. At 1 meter away, the corner of the face that is closest to the light, is brighter than the corner farther away. Once moved to 3 meters, this distance is too small for that affect, so the 3 meter version is very flat. The specular is more pronounced, and the shadow edges are harder.

I definitely prefer the 1 meter version, and with the grid it has slightly more volume, while maintaining almost the same level of softness. However I can't always keep the light just 1 meter away. The 3 meter is not what I want. Too hard edged of shadows, specular hotspots too hot, and the transition from diffused highlight to shadow, is too harsh. It really emphasizes the skin texture, in a way I don't like. The 2 meter is an ok compromise, but still a bit too much.

I'm glad to have done this test, as I now know my "hard limit" for how far away I place this light mod. I will keep it within 1 meter whenever possible, and keep a 2 meter distance as my maximum. The last shoot had the light more like 3.5 meters away, and unnecessarily so. I could have easily brought it to about 1.5 meters, and had I already done this test and known this behavior of the light, I would have.

Tuesday, June 23, 2009

andre_portraits

andre-2

Settings: Ambient is properly exposed, but leaves his face 2 stops underexposed. Flash is at 2 stops over neutral grey, and is hitting just his face.

I did my first real photoshoot this weekend here in Cologne. I'd passed this location everyday coming home from work, and I thought the line of trees was a really powerful compositional element. I got a chance to use my new Elinchrom Ranger Quadra, with the Chimera softbox and 20 degree grid.

The softbox was originally placed far enough away to be out of the frame for this shot:

andre-1

However once I moved closer for the main shot, I should have brought it in closer, so that it would have a softer shadow edge. I would also have put it up to full stand height, and brought it closer around to the lens axis, for a loop pattern, instead of a rembrandt pattern on his face. Even with it further away than necessary, it's definitely softer than a bare shoe mount flash would have been, and you don't get near as much specular highlights on his skin.

The compositional elements I really like are the light beam coming from the top of the image downward. I think it explains to the mind where the light is coming from. The tree line and path also leads the eye into the figure, and the lightness of the path helps make the pants silhouette pop.

The ability to adjust the flash power from my camera was really helpful. I got to keep my time all focused on the subject, and not have to worry about walking back and forth. I also liked the modeling light, but it only was bright enough when we went indoors, and when the evening got really dark.

andre-5

Settings: Ambient is two stops below neutral grey. Flash is at 2 stops over neutral grey, and is hitting just his face.

Location two was much cooler in my mind, but I had discovered it while drunk. I still tried to make the best of it, but couldn't get the image I saw in my head. Mainly it was because the location didn't line up as well once compressed into a 2d plane, as the space "feels" when you're there. Also the path behind the booth was too dark to add to the composition. I still like the idea, so I'll be looking for a spot that better fits this impression for a future shoot.

So, first impressions of the ERQ while out on a shoot: The wireless control worked flawlessly. Setup and take down of the chimera softbox and grid was smooth and quick. Modeling light was great once it went fully dark, and while indoors. The 20 degree fabric grid allowed me to throw a softish light from out of the frame onto just the face of my subject. Overall I'm really pleased with the upgrade.

Friday, June 19, 2009

elinchrom_ranger_quadra_speedring

My Elinchrom Ranger Quadra DIY speedring is all finished.

elinchrom_ranger_quadra-15

As of right now, the ERQ does not have any lighting modifiers other than the included reflector, an umbrella with a 7mm shaft, and an 18cm reflector which lets it take the standard 18cm Elinchrom grid spots. Eventually there will be a 40x40cm softbox which mounts directly onto it, but for all else, you must purchase their adaptor, which has it's own light stand mount, so that the weight of the light mod is held by the adaptor, and the flash just sticks out the back. It's a good design for larger mods, but it means you have to purchase their adaptor (80 euro MSRP) PLUS an Elinchrom speedring. The other downside is that it doesn't appear to keep the flash tube entirely inside the mod. You can see a photo of it here, on Isker's flickr. He is the only person with a version yet, because it's not available to purchase from Elinchrom. (he purchased the demo unit from the Moscow Photo show).

So, in order to mount the new ERQ to a softbox, you need the 80 euro adaptor which won't be available for another 2 weeks, AND an Elinchrom speedring (20-30 euro), AND you have to lose some light by having the tube in a slightly recessed reflector. I was unwilling to wait, and didn't want the tube recessed. I want it fully inside the softbox. My softbox is also quite small, I have the XX Small Chimera, so I know the ERQ head can hold the weight of the softbox. Thus, I fabricated my own. You can see more shots of it in the previous blog post.

You can see how it keeps the tube fully exposed and inside the softbox in true bare bulb style.

elinchrom_ranger_quadra-16

It's all aluminum, so it's quite lightweight. The biggest problem was grinding down enough of the bolt heads to get it to attach, but not so much they slip out. I epoxy'ed every surface before attaching, for extra strength.

Wednesday, June 17, 2009

little_preview

So, doing some DIY for my Elinchrom Ranger Quadra.

First, hard plastic protection cap for transporting.


Next, and this isn't done yet, but a little sneak peak, is the speedring. This is all Aluminum, other than the bolt/screws, so it's actually quite light. I still need to dremel out the notch for the large retaining knob, and shave off most of the screw heads in the inside diameter. I really didn't like the design of the default Elinchrom adaptor, it does not keep the entire bulb inside a softbox, so I created mine to do that. The problem is that leaves no room for screw heads, so I have to shave them almost completely off.


Saturday, June 6, 2009

elinchrom_ranger_quadra

elinchrom_ranger_quadra-9

It's here! I believe this is the first Quadra delivered to Germany. I think it's also the full writeup from an individual, and definitely the first unboxing post. I normally don't do this kind of thing, but since it's so new to the market, this might help some people decide. There were some things I wasn't sure of, that I would have loved to know before buying.

elinchrom_ranger_quadra-1

elinchrom_ranger_quadra-2

The box was conveniently sized. Not too large, it fit in my backpack to take home by bicycle.

elinchrom_ranger_quadra-3

Everything was packed nice and tight, with cardboard padding to keep it from rattling around.

elinchrom_ranger_quadra-4

First things out are the manuals, shoulder strap, PC-sync cable, and the connector cable for the head to power pack.

elinchrom_ranger_quadra-5

Everything out of the box. Click through to Flickr to read the notes highlighting what is what. I love the fact the charger has easy to change adaptors, for UK, US and EU, so you don' t have to pack an adaptor. I like how the charging port is on the battery itself, so if you buy a 2nd, it can be charging while you are using the power pack and other battery. It can also run off wall power if the battery is gone, but it won't charge till you turn the pack off. They included 2 standard 20 watt fuses, and there is a tray for both. They recomend to remove the necessary one while traveling, so it's nice to have 2 spots so you can have your main and spare in the pack, so you won't lose it, while traveling.

elinchrom_ranger_quadra-6

Closeup of the pack itself. Large size should let you read all the text. Again, click through to flickr to read the notes. I like how it has LEDs for each function so you can easily see. I also like how you can have the power display either in F-stops or in Watt seconds. I picked Ws because I understand that better, coming from someone who never uses a light meter. I like that all the top ports are covered when not in use (like the sync port) to keep out light rain, though they don't recomend using it in the rain. The shoulder strap hooks are also very nice, and I like that they are carabiners to fascilitate easy removal.

elinchrom_ranger_quadra-7

elinchrom_ranger_quadra-8

The head itself compared to the 580ex II.

elinchrom_ranger_quadra-9

Full setup. I particularly like how the battery pack acts as a weight to really stabilize the stand, without being too heavy for these Nano stands.

elinchrom_ranger_quadra-10

elinchrom_ranger_quadra-11

Closeup of the S-head. Note that the umbrella holder DOES NOT fit Wescott hexagonal umbrella stems. The stems are too large. Also note the lack of a clamp of any sort. These fit the Elinchrom shaft diameter, which I believe is 7mm. I am awaiting the arrival of my replacement Alzo 60cm silver umbrella, which I'm unsure if it fits or not. This is the only dissapointing aspect so far.

This head does not use the standard elinchrom mount. If you want to mount elinchrom modifiers to it, you have to purchase an adaptor. I want to try to build one myself. I plan to get the XXS or XS Chimera softbox with a 20 degree grid, but it will have to wait till next month's paycheck. :-) There is coming a 40x40cm Elinchrom softbox that will mount directly to this head without the need of the adaptor, but it's not out yet, the price isn't known, nor whether it can accept a grid, which is important to me.

Now for some comparisons in light quality. Inside a lighting modifier, the light source itself is practically irrelavent as long as it can fill the light mod, and be bright enough. A 60x60 cm softbox will look the same on the subject regardless of the flash inside it, if the power levels are comparable. However bare bulb is a different aspect. Bare bulb throws far, won't blow over in a strong wind, and is the fastest to set up. It also gives a very edgy harsh look, but it's very rarely desirable.

elinchrom_ranger_quadra-12

This is lit with the Canon 580ex II. Bare, at 105mm. Notice the hot specular on nose and forehead, and the razor sharp shadow from the nose on the cheek, the harsh transition from light to dark on the edge of the face, and the sharp shadow on the wall from the chair.

elinchrom_ranger_quadra-13

Lit with the Modeling LED light only. This one is interesting, because it's supposed to be daylight balanced, but in actuality runs quite yellow, at least on mine. It's possible it warms up to be properly balanced, but when it just turns on, it's 4500k with a green tint, not 5600k as claimed. So if you're wanting to use this for a video light, be aware that it is not daylight balanced as claimed online in other places. I still find it useful for previewing the light position on the face. I don't know yet if it's bright enough to push through a softbox to see the light on the face, but bare, it works fine, and throws quite far. It has a bit of a hot core, then a much dimmer surrounding. This is because it sits flush, and isn't able to bounce much into the reflector. You can program how long it stays on from 1-60 seconds, with a single button press, or if you hold it for 3 seconds, it stays on till you turn it off again. Very nice that you can leave it on as long as you have battery power, to do some light painting.

You can see the shadows are a bit softer, most noticeable on the chair shadow, but it gives kind of an odd, uneven softness.

elinchrom_ranger_quadra-14

Lit with the flash itself. The shadows are softer, but you have to look close to see it. The chair shadow shows it the most. I won't use this bare with the 13.5cm reflector much, but it's nice to know that it is softer than the 580, which I would use bare sometimes. Any amount of built in softness is nice.

Here is an animated gif flashing through all 3, so you can better appreciate the bare flash bulb difference.


The best places to view the differences is in the chair shadow on the wall, and the tip of the nose shadow where it almost joins the cheek shadow.

I'm really excited to use this kit more, unfortunately it will have to wait till I get at least one lighting modifier. I had planned to use my umbrella till I get the Chimera, but since it doesn't fit, I can only use it barebulb for now.

One thing that I wanted to know, and have now confirmed, is that you can change the incremental power changes via skyport. The default setting is 1/10 of a stop per button press, but that's a lot of presses if you're off by a lot on your first shoot. I also don't like doing tiny changes, as I find things normally need a bit more to be noticeable. You can also set it to 1/10-1 stop increments. I've got it set to 1/2 stop increments. So each up or down press goes down 50% or up 100%.

Pros of the Quadra over the 580exII

  1. Much MUCH brighter highest power.
  2. 1.2 second recycle time at full power, compared to 5 seconds on the 580exII. If you turned the Quadra down to the power of the 580, you'd have near instant recharge.
  3. Lower minimum setting. Just 8.2 Watt seconds on the B port.
  4. Lighter head. The head is all that must sit on the end of a boom, so the 250 grams of the Quadra head is nicer than the 375 grams of the 580ex II
  5. While the battery pack does have to be carried, it can serve as a stand weight to stabilize.
  6. Bare bulb, it throws in all directions, whereas the 580ex II only throws straight ahead. This results in the Quadra filling the light mods more fully. As an example, inside a softbox, the 580 just goes straight and hits the first baffle. The Quadra also goes straight sideways and hits the silver of the interior, resulting in more even light coming out of the front.
  7. Softer bare. As the examples show, with no light mods, it's a softer light
  8. Built in skyport. This is the biggie. No pc-sync cable to bother with, no skyport to velcro to the top of the 580ex, it just works wirelessly soon as you turn it on.
  9. Built in wireless power adjustment via radio! Yes, with the Canon 220 you can control the 580's power remotely, but it has limited range, and doesn't work that great outdoors. This allows you to control the quadra's power output via the Skyport remote trigger, and it's radio based, so you get crazy range, and sunlight doesn't phase it. This is the number one reason I bought this unit. I can stay in front of my subject, and adjust power without interupting our shoot.
  10. Built in stand mount. With the 580, I have to also setup the flash mount on the stand, before I can mount the flash. It doesn't take that long, but it's just one more item I have to deal with, that slows my setup time before I can shoot. The S-head has the stand mount attached, so you just pop it on the stand and tighten.
  11. Much improved modeling light. The 580 has one, but it's just a 1 second long pulse. You can't really take a photo with it, it's hard to light paint with it, and it's far too weak to fill a light mod. The Quadra's can stay on as long as you need, and doesn't flicker. It's not daylight balanced, which is dissapointing.
Pro's of the 580exII over the Quadra:
  1. Size/weight of the total unit with flash and batteries included.
  2. Can't mount the Quadra directly to the camera (which I never do anyway)
  3. No TTL on the Quadra (again, never do that)
  4. More weather proof.
  5. That's about it.