
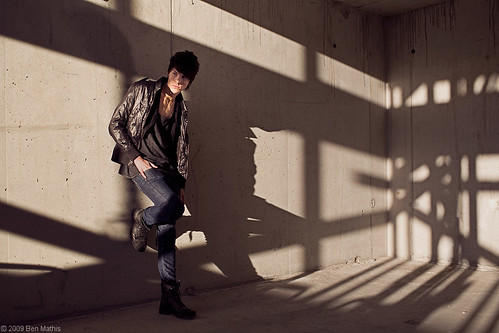
Settings: Sunlight only, but with a silver long throw reflector just outside camera right, filling the shadows on his face.
Iceland experienced quite a financial boom in the last 10 years, that came to a grinding halt in the last year because of the financial crisis. It´s left a lot of half finished buildings all over the city, many of which are not being worked on. I personally love man made spaces that are empty or abandoned, so I knew a photo opportunity awaited.
I did a scouting run the day before. I have decided this is really the best way to shoot. I can take my time exploring around for good angles without any pressure, and most important, note down at what times the light is perfect for what I want. It also allows me to have the images to both show and excite the subject, possibly giving them ideas for hair/makeup/clothing. It also allows me to look at them at my leisure at home to determine how I want to light them.
Here are my research images:
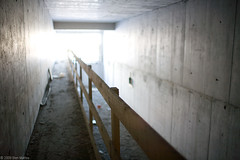
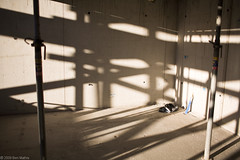


I took more than this, but mostly I was walking around the place, seeing what caught my fancy, what angles felt nice, examining how the light fell, and trying to envision what it would be like to have my model there in front of me, and what I might ask of them. This trip is to get comfortable with a new place, so that I have less to worry about during the actual shoot, which is hectic enough already.
My general workflow goes:
- Observe constantly during my daily errands and travels. If I find someplace that looks promising, I plan a research trip.
- Do the research trip. Guess at what time the light will work well with the location (lots of lights and reflective surfaces = night, open side areas with lots of soft light from the sky = daytime on a cloudy day, lots of interesting shadows and bounce surfaces = direct sunlight, etc)
- Explore with an eye toward eventual photos. Let my mind chew through what I'm seeing and imagine what kind of subject I'd want, how they should be dressed, colors, lighting, etc. If any of my ideas prompt some further exploration while there, the more the better. I take only my camera and lenses on this trip, no lighting equipment. This is to be a bit more mobile, but also because I am just exploring the location and seeing what's possible with ambient.
- Edit images at home. I try to bring out the "feel" that I want from them, the same way I would if the subject were there. I tone shadows, white balance, recover highlights, fill shadows, the whole shebang. I want to know if there are any shooting conditions I should be aware of. In some cases I want to let things blow out, and in other cases I want to be careful of the highlights. If I find that I need as much dynamic range as possible because the contrast is so high, that will let me know to keep my ISO as low as possible (cameras lose dynamic range as you bump up ISO)
- Show images to the subject, and get their feedback. Mostly this is to get them excited about the shoot, but also so they can be thinking about it. It might give them pose ideas, or get them in the right mental state. Mostly I think it helps them pick out their outfits. I normally give a general guide (all black, mostly white, something bright and warm colored, etc) but let them pick outfits they think they look best in. If it's a really involving shoot, I'll do a wardrobe planning session with them at their house.
- Try to figure out lighting scenarios. I first try to figure out where I wan to place my subject in the frame from what I've picked out. Then I envision how the existing light will light them, and if it needs modifying or amplifying. Lighting normally falls into 3 categories,
- no lighting required, just the ambient plus possibly reflectors or subtractors.
- using the existing light sources and angles, but either boosting the level by placing a flash in the same place, or by complimenting the existing light with another flash filling in the shadows
- providing the lighting completely with the flashes.
I knew the thing I liked most was the shadows. I knew that I would want the shadows to play over the subject, and possibly have some of the shadows on the face. This sunlight faded quickly, so I had only one hour when this light existed. We shot here first because it was my favorite setting. I knew that the room bounced enough ambient that the shadows wouldn't be jet-black, but I imagined my silver long throw reflector would be a benefit to fill the face shadows. The location scout helped me figure out most of this, so once we arrived and I unpacked, I merely had to direct the model, and have my friend keep the silver reflector aimed at his face. Having an assistant on shoots like this is super beneficial.
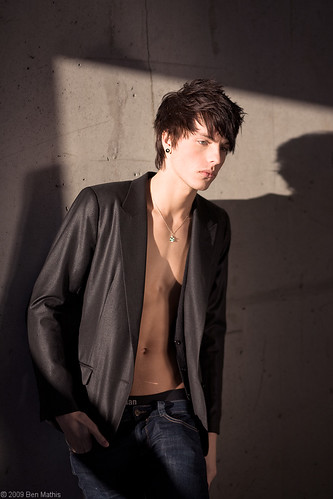
I made sure to try different angles. As much as I loved the full room shot with all the shadows, the lighting was superb, and the model has a great body and facial features, so a closeup was definitely in order. I am glad I tried some closer shots, as this is probably my favorite shot from the shoot. I had to pay attention to the red channel in the histogram, because red represents the skin (on white skin) and if it clips, you most likely have blown out skin. I did want a bleached look, and I wanted enough shadow information to lift, so I let the red channel skirt the right edge of the histogram, without slamming up against it.
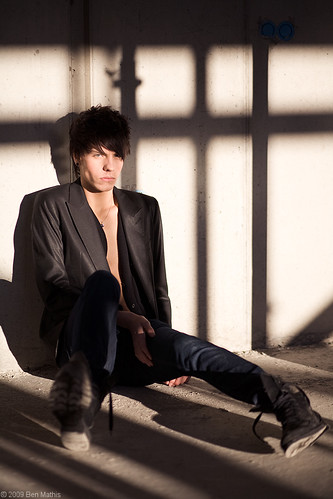
The far side of the wall had some awesome, even busier shadows going on, so I had to be sure to take advantage of them as well. After getting enough of the main wall, we moved to a sitting position against the other wall. I was laying prone on the floor to get the best angle on a few of these. One thing I learned early on, is to consider different heights. Don't always shoot from standing normally. Stand on things, go on tip-toes, crouch, lean against things, kneel, or even lay flat. Think about the emotion you want, and the angle.
Be sure to ask your model about poses. I normally suggest a pose by showing them myself doing it, then I ask them to get comfortable in that pose (so it doesn't look so stiff). I will get a few photos, then ask them if they have any ideas for poses.
One good thing to do, is at the beginning, explain about head angles. I am constantly watching how the light falls on the face and eyes, and if I want something different, I will ask them to rotate their face towards me or away. If you don't explain what you mean, the subjects have a tendency to rotate much too far when you ask. At the beginning, I explain what I'm doing, that I'm watching the light, and I might ask them to rotate toward me or away, and I want them to do it slowly so that I can ask them to stop. This helps immensely, and can be the difference between getting catch lights, or a good light angle, and getting unflattering lighting that falls poorly on the face.
Tell your model they look great, be excited about the photos, and show them! If they see that it's coming out awesome, it will rid them of any feelings of looking silly. This is especially important if you're using a non-model (someone you just asked, because you like their look).
I think this is the longest post I've made on my blog so far, but I learned a lot on this shoot, and wanted to share.
Remainder of the set.

Great post - and the length was fine: you explain everything carefully and well, so no need to worry!
ReplyDeleteReally appreciate your sharing,
Craig