
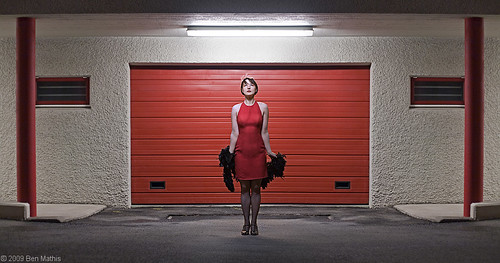
Settings: Ambient is right at neutral grey. One flash into a small silver umbrella held directly over the subject's head at 1.5 stops over neutral grey.
I saw this garage door and strip light while walking at night, and it just had the nicest feel. The long fluorescent tube gave off such a pleasing light in the otherwise dark night, and the red door seemed to really have a presence to it. I knew I wanted to do a shoot here.
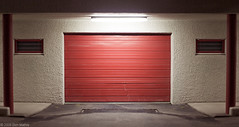
First I did a test shot to see my framing and figure out what type of subject an lighting would work:
The background was symmetrical, so I knew I wanted to use symmetrical lighting. I also wanted something simple, so just one light. I ended up using my small silver umbrella. Ideally I would have had a heavy duty C-stand, with a long arm and a counterweight, but honestly the wind was so strong that I think even that wouldn't be enough. I ended up holding the lightstand myself, which required me to use the 10 second timer. It was not fun to hit the button, run forward, arrange the stand, give direction to the model, photo takes, then I run back to check the image, and start again. An assistant would have been great, or my remote trigger, but I'd already packed it for the move.
Here you can see how it was working.

Knowing I would be in all the frames, I took a clean "background plate" at the beginning. This was also necessary for the radically different light sources. I had no idea how to gel for this particular tube light, as it wasn't the traditional fluorescent green. It was easier to just shoot a background, balance it, then composite her on.
Here is the retouching process:

1. Original photo of background, brought in from lightroom. It's been color balanced, the red shifted to have no orange and be a true red, and some constrast adjustments, bringing the clipped whites around the light back with the highlight recovery slider. CA was removed with my 50mm preset.
2. Distortion removed with the free transform and lens distortion filter.
3. Left half duplicated to right half for symmetry, but using a mask to disguise the middle bits so you don't get a Rorschach effect giving it away.
4. Tire tracks removed using an earlier shot background plate (car ran right in front of me with wet tires)
5. Blue lens flare removed from bottom and top. (very subtle but would be visible in a print)
6. Bring in the layer with subject.
7. Mask away the background using the magic lasso to start, then using a soft 50% opaque brush for the hair and boa to do careful masking.
8. Color balance her main light source.
9. Color balance the "fringe" where the light is leaking around from the fluorescent tube.
10. Final fixes on her fly away hairs, removing the last bit of orange.
11. Desaturate ground layer to hide the dual light sources. I needed the ground here to show her shadow and anchor her down, but had to remove the color giving away the composite job.
12. High pass desaturate sharpen layer.
13. Hide wrinkles and add body using healing brush and overlay layers (this was done under all the color correcting layers, but I did it last. It's non destructive but didn't have as much to do with the final image as all the color sources.
I also practiced the poses and tried to visualize them beforehand. The first image of this post is pretty much exactly how I envisioned. I really feel that lately my best images have been the ones I've previsualized strongly beforehand. I feel that I can go out with almost anyone in any lighting and get a good normal portrait just mucking around, but my favorite recent images have all been very "produced".
This is also why I have no problem with so much photoshop in post. I wanted the image at the beginning, and I don't mind doing whatever is necessary in post to achieve that vision I had to begin with.
Here is one other after an outfit change. I like it, but I don't feel it's as strong as the red on red:
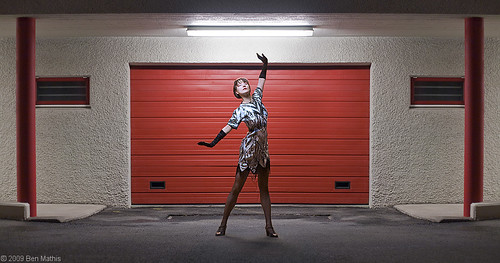
Settings: Ambient is right at neutral grey. One flash into a small silver umbrella held directly over the subject's head at 1.5 stops over neutral grey.
After nailing the full body ones, it was time to do some playing around. I asked her if she had any ideas, and she wanted close ups, especially using her boa as "hair". In this case, the strong wind really helped give the feathers some motion, which I think strengthens the image.
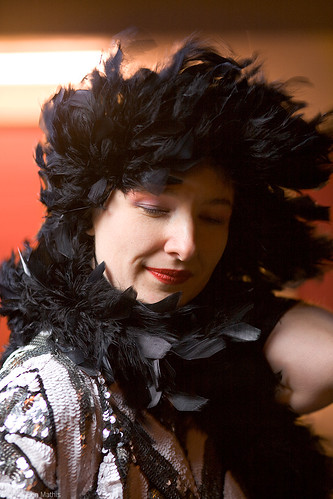
Settings: Ambient is 2 stops below neutral grey. One flash into a small silver umbrella to camera left at 2 stops over neutral grey.

I really dig the first shot, very cool!
ReplyDeleteRyan
http://www.ryanhollowayphotography.com
Cool shots indeed. Interesting what you say about previsualising your images - this is something I want to work on... I strongly believe that the preplanned, thought out shots have an edge over 'grab' shots when it comes to portraiture/editorial type of photography. Doesn't apply to documentary/street photography - or does it? I suppose it could, actually; documentary photos can have an element of preplanning I guess.
ReplyDeleteAlso agree re post processing: I feel that the final image is what is important, regardless of how much or little photoshop has been employed to get there.
Cheers guys!
ReplyDelete