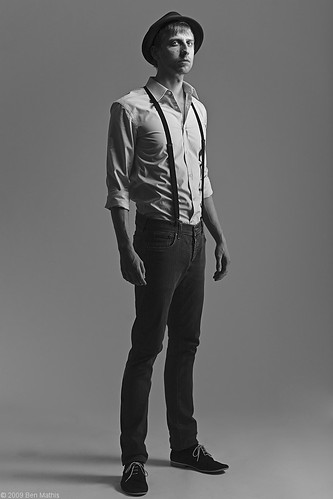
Settings: Ambient is effectively gone. Not sure the ratio between the two flashes, but the output is 2:1, the main on the face double the brightness of the side light. The main is in a less efficient modifier, but it's also physically closer. I'd say side is 1 stop over neutral grey, and the main 1.5 stops.
This is a first shoot for a couple of techniques for me. It's my first real shoot using the giant panels I reviewed in the past post. I really like how soft the quality of the light is. Works great as a fill with the small softbox acting as my main to draw attention to the face. This is also the first time I worked with a remote shutter and the camera on the tripod. This was immensely freeing for directing the subject, and I could really focus on connecting with him, instead of hiding behind the camera. I was able to be closer to him physically, for a more human interaction as well.
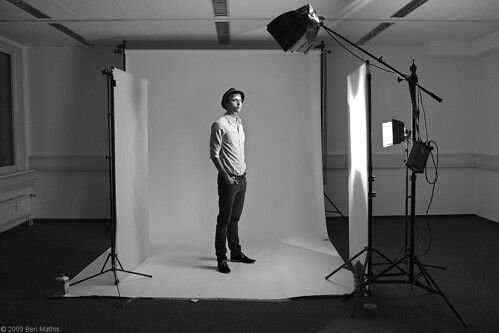
Here is the setup shot. Click through to the flickr to see notes over the different lights:

Real quick rundown. The Quadra pack is a 2:1 asymmetric pack. The small softbox is in the A head, getting double the output of the side light that is aimed into the panel. This is as full as I could fill the panel without serious spill on the background, but I would have preferred to fill all of the panel for a more soft and even light. The main head is in my 30x40cm XXS softbox with the 20 degree grid. This keeps it right on his face, feathering off down the torso, and the grid keeps it from spilling on the background. The 2nd panel is providing a reflector to keep the shadows from going pitch black. I could bring it closer to fill them more, or further to create more contrast. Without that 2nd panel all together, the shadows would have been jet black.
This barndoor solution isn't working yet. The default reflector is just too wide angle, so even with the barndoors closed almost completely, it can spill out over the edge. I'm in the process of buying the 18cm reflector which will give me more control.
I was able to set everything up in about 30 minutes, including the background (borrowed from a friend). Since I was working with a tripod and remote trigger, I was able to test the lighting on myself before the subject came, but I'm looking forward to next week when I'll finally have my light meter. My settings will be much more accurate from then on out, as so far I've been guessing at ratios. Once he came I fine tuned the placement of the softbox. I have wheels for my light stands, but didn't bother to bring them this time, and I really wish I had at least brought one set, as positioning the boom stand with the softbox was a pain without them. I also need to make a small strap for attaching the quadra power box as my boom counterweight.
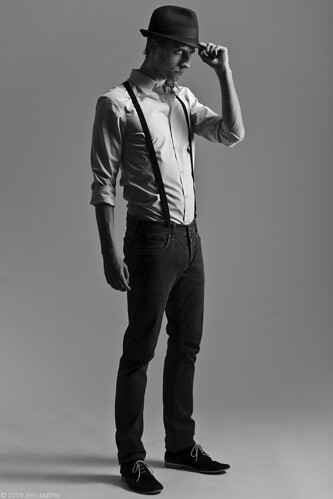
The shooting session went really well with the remote trigger. He had never been in a shoot before, and was a little unsure, but being able to be close and use full hand movements and body language to show poses and communicate was a real positive. I don't like working at f/8, as the background didn't need to be in focus, this was at f/4. This enabled me to use the pack power really low, like at 80 watt seconds for the main, giving me insane recycle times. I never had to wait, it was always ready for another pop. That enabled me to get some really great mid emotion shots like this:

Working with modeling lights is really great, for those readers who only use speedlights. For perfect placement of the light, especially on the far eye from the light source, it's really key. This specific shot relied on very carefully directing the turn of his face to be just right:


modeling lights it is really cool! good work!
ReplyDeletecant wait to try your technique!
ReplyDelete