
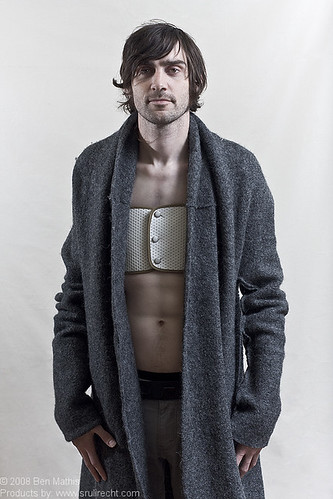
A friend of mine, Sruli Recht is a tailor and shoemaker, and he routinely asks me to shoot his products for his website. Above is a jacket he´s made, and underneath is a protective brace. Some people have ribcages that will pop out of socket if not held in, and this brace does just that, but it´s a designed product from a tailor, rather than a medical product.
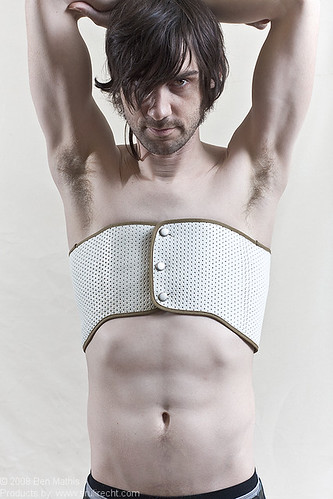
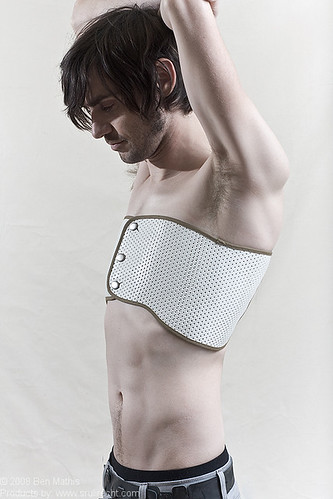
Here is a shot of just the brace:
Settings:
2 Vivitar 285hv
main flash at 1/4 power,
at wide zoom,
into silver 43" bounce umbrella,
light stand was at 2 meters height,
1 meters to right of subject 1 meter forward from subject,
2nd light was at 1/16 power,
at wide zoom,
2 meters to subject left, and .5 meters forward from subject,
at 1.5 meters in height.
Unfortunately I forgot to take a setup shot, however it was very simple. The background is a plain piece of cloth, and both lights are basically at 45 degree angles aimed at the subject. this eliminates the shadows on the back wall, and creates a very even lighting. However the fact one flash is bare, and one flash is using an umbrella, gives a nice difference in quality of light from one side to the other. One side has soft, broad lighting, and the other has a bit harsher, sharp lighting. I will definitely use this type of setup in the future. I was working right at 1/250 to kill as much ambient and darken the shadows as much as I could, since this cross-lighting would otherwise create a too-even lighting if the ambient was allowed to leak in.
Here is an angle that shows how hard the left light was, based on the hard shadow line from his nose across the cheek. The edge of the cheek shows the soft falloff from the right flash. The other nice part of this lighting setup, is the subject could rotate freely with no need to adjust the lights.
I ended up doing quite a bit of post on these shots. Mainly to adjust the subject's physique.
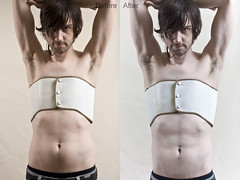
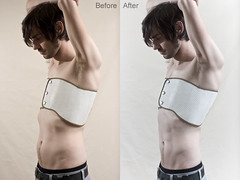
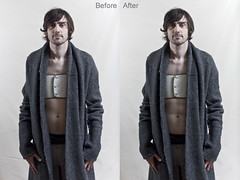
I started by using the warp and liquify tool to readjust the main proportions, then I quickly cloned out any skin imperfections (which there were very few), and then proceeded to use the dodge and burn tools to add in muscle definition. I finally used a regular brush with a flesh color, set to saturation, to add back in the color that dodge and burn tend to remove. Finally, I enhanced or added in catch lights to the eyes to make it feel more vibrant.

No comments:
Post a Comment