Showing posts with label agust. Show all posts

Wednesday, January 21, 2009

More silver reflector

lighting_practice-1

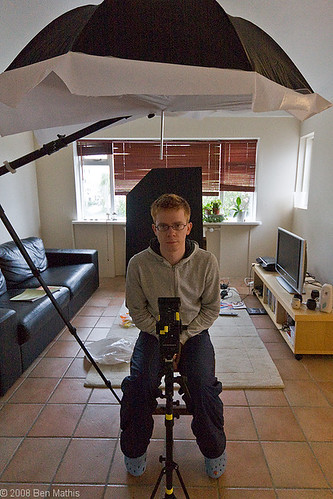
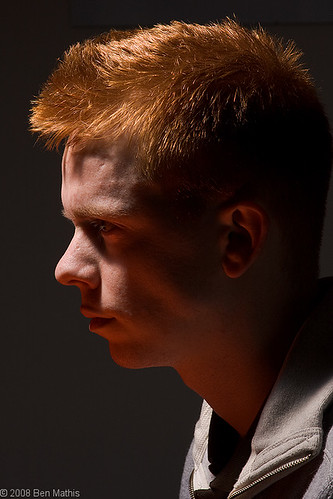
Settings: Ambient is 4 stops below neutral grey. Flash into 110cm silver umbrella, 2 stops above neutral grey, to the right and above. Silver 1x1.2 m reflector to the left and below, angled up. Tiny slave flash in the background lighting it up.

I decided to try an experiment with the silver reflector. Normally I like edgy lights, with deep shadows and strong direction. Soft light is easy light, I always thought. But I wanted to try some soft, easy light. I put my favorite soft light, a 110cm silver umbrella, high and to the right, and used the reflector to fill in the shadows. Then I put my tiny morris slave flash in the background, through a blue gel, at it's lowest setting. That lit up the background for a nice light, airy feel. A warm gel would have made it feel a bit warmer, and I should have tried that.

lighting_practice-2

Settings: Ambient is 4 stops below neutral grey. Flash into 110cm silver umbrella, 2 stops above neutral grey, to the right and above. Silver 1x1.2 m reflector to the left and below, angled up.

Then I turned off the slave flash in the background, to get a dark backdrop. This completely changes the look of the portrait. Having a dark background implies there is the proper amount of lighting, so even though the skin is super softly lit, it looks "correct", and implies youthful skin, since wrinkles and pores are minimized in their shading. Women or self conscious men will love this lighting setup. The light backdrop of the first works well too, especially with a little texture so that it looks legitimate.

Here's the setup shot:

lighting_practice-3

If I wanted the shadows a tiny bit darker, I could have switched to the white reflector instead of the silver. I am guessing the silver reflects -1 stop, and the white -2 stops. That would give you either a 1:2 ratio of main to fill
with silver, or a 1:4 ratio with the white. Assuming they are placed as close as possible of course. Distance also reduces light intensity. Moving white backwards a bit would give you 1:8 ratio.

Monday, January 19, 2009

Slight flash

agust_recline-1

Settings: Ambient is about a stop below neutral grey. Flash through honeycomb grid aimed at face, from high up and to the right, at one stop above neutral grey.


I realized all my favorite photos, both that I've taken, and that I like of others, use a lot of ambient light, and the artificial light is very subtle and only adds a little pop to the main area. I really want to pursue this line of lighting this year.

For this photo, almost all the light is window light from the left. I got on a chair to shoot from this height, and took at f/1.8 to get a little depth of field on the feet, so that the attention was kept on the face. Once I had everything exposed right, I decreased the iso by one stop to make everything a bit darker. Then I added my flash to a stand at about 2 meters height, to the right, aimed it at his face, and added a honeycomb grid to constrain it to just his face. Without the grid, even zoomed to 105mm, it spread to the rest of the bed and body. It had just enough softness to fade out nicely, and because there was only about a stop difference between ambient and flash, even though the edges of the shadows from the flash are harsh, they aren't very noticeable. If I had dropped ambient another stop or two, the flash shadows would have been extremely noticeable.

I'm still working on a portable option that lets me through softer light a longer distance. I'll let you know what I come up with. I would have loved to have this light constrained only to the face like this, but softer.

Saturday, November 1, 2008

Simple portraits

Agust_portrait-1

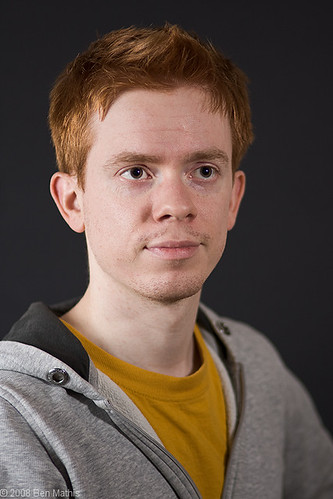
Settings: Ambient is 3 or 4 stops underexposed. Left light is a flash into a silver umbrella at 2 stops above neutral grey, and right flash is through a Lumiquest softbox 2 at 1 stop above neutral grey.


I have felt a bit like I might be trying too hard to deviate from "safe" and standard lighting, so I have been wanting to try some more traditional lighting setups. By putting the umbrella at the same height as his head, and aiming it horizontally instead of angled down, it emulates window lighting quit well, and is very soft. The right side light does an ok job of filling, but I think either another umbrella, or just bouncing that flash off the ceiling to raise the light of the room would have looked nicer. It would have kept the harsh shadow from the left side of his nose.

The background is just a piece of black posterboard taped to the wall. I'm going to add to my kit a length of black, and white fabric to use as quick backdrops.

goth_agust-1

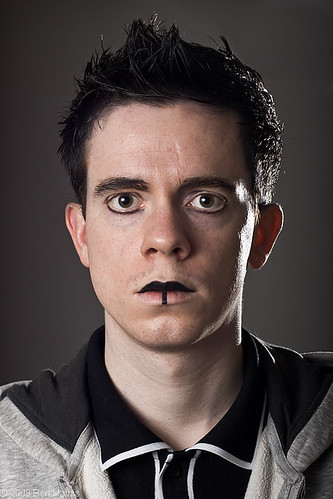
Settings: Ambient is 3 or 4 stops underexposed. Left light is a flash into a silver umbrella at 2 stops above neutral grey, and right flash is bare, zoomed to 105mm at 3 stop above neutral grey.

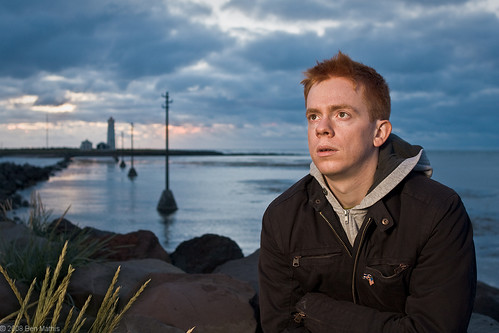
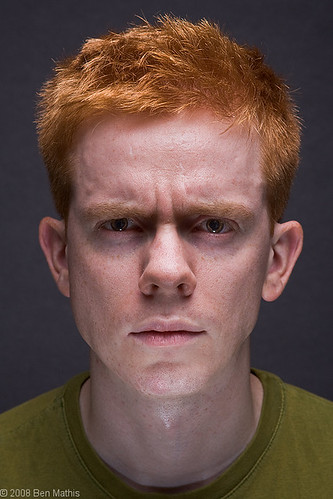
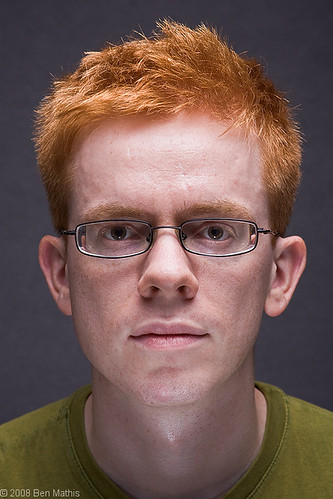
For this shot, first Agust got ready for the Gothtasm Halloween party by dying his hair and applying makeup. Since it was such an effort, I decided it would be good to document it. This is a fairly standard setup also. The silver umbrella is a little high and aimed down, to produce nice directional lighting. The right flash provides a really nice rim light along the cheek and back of the head, for a bit of separation from the background. I think this is easily my favorite lighting setup.
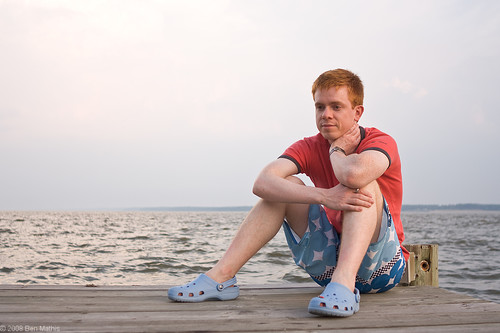
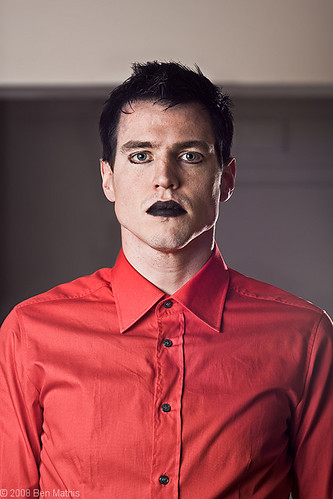
I had to get in on the action too.

goth_ben-1

As a slight aside, I recently purchased a photo editing monitor. The HP LP2475w. It's a 24" monitor that uses an S-IPS panel, which is a true 8 bit panel, that does a very wide gamut of colors. It's a huge upgrade from my little 17" laptop, both in color accuracy and brightness. I also got a monitor calibrator to ensure color accuracy. Even just looking at other people's photos is more fun now, because I can see so much more detail and dynamic range. I highly suggest ensuring you have a good monitor with accurate color (either an S-IPS or S-PVA panel, not all LCD panels are made the same way, TN and TFT which is the most common used panels, are not true 8 bit color) and a monitor calibrator to ensure you're getting your colors correct. I know I've been over compensating for my poor monitor quality in past photos by pushing the contrast and colors a bit too far.

Monday, October 20, 2008

Tunglið and Spheres

haukur_tunglid-3

Settings:
2x 580ex II
Main flash at 1/128,
at 105mm zoom,
light stand at 2 meters height,
2 meters to the left and 1.5 meters forward from subject,
Rim light at 1/128,
at 105mm zoom,
light stand at 1 meters height,
2 meters to the right and slightly behind subject.

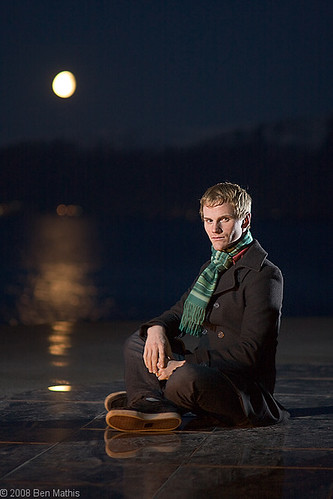
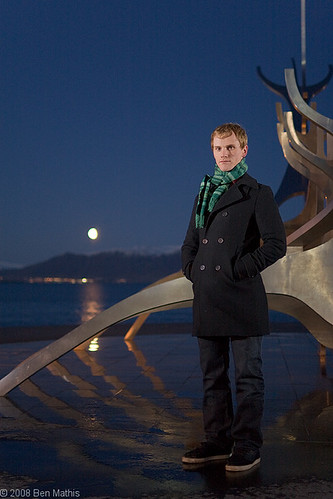
This weekend I did two different shoots, one outside and one inside. My main goal was working with bare lights and trying to come up with flattering positions for them. I feel like I've learned a bit more how to use them, but I'm also realizing there is a limitation as to how flattering you can make bare flashes, especially outdoors where the ambient is low. The next few weeks I'll be investigating how I can soften the light while still having some good throw.

haukur_tunglid-2

Settings:
2x 580ex II
Main flash at 1/128,
at 105mm zoom,
light stand at 2.5 meters height,
3 meters to the left and 2 meters forward from subject,
Rim light at 1/128,
at 105mm zoom,
light stand at 2 meters height,
3 meters to the right and even with subject.

For these, I knew I wanted to do a shoot with this subject, but wasn't 100% sure on the location. However driving to his house, I saw how great the moon was over the distant mountains. Ideally I would have arrived about 30 minutes earlier and it would have been a lot nicer with a higher ambient light level. Even with the flashes to freeze the subject, I would have liked to have had a tripod with me to help use even slower shutter speeds, especially with the sitting shots, as I used an 85mm zoom lens for those. There were already lights present for the ship statue, and they illuminated the subject enough to cause blurring with shutter speeds any slower.

agust_double_balls-3

Settings:
2x 580ex II
Main flash at 1/128,
at 105mm zoom,
through gridspot,
light stand at 2 meters height,
directly in front of subject 1 meter away aimed at his face,
Rim light at 1/128,
at 105mm zoom,
light stand at 2 meters height,
1.5 meters to the right and 1.5 meters behind subject.

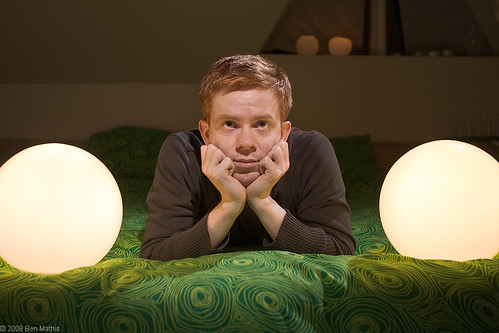
For this, I wanted to utilize these glowing ball lamps that I had. It didn't turn out quite how I envisioned in my head when I wanted to do this shot, but it was still fun and gave me practice. I started by placing my camera on a tripod to the height and angle that I wanted. I then positioned the light spheres so the fit into the frame composition how I wanted. I placed a backpack in the position that the subject's face would be, and arranged my flashes so that I could determine placement and power. The front flash had a grid spot on it to confine the flash only to his face.

Once I had the placement and power of the flashes, I was able to darken the ambient by increasing the shutter speed to 1/250. If I had wanted to decrease it even more, I could have changed to ISO 100, increased power to both flashes by 1 stop, and left shutter speed and aperture the same, and the ambient would have been one stop darker.

More from these two sets:

haukur_tunglid-1

agust_double_balls-4

Friday, October 17, 2008

Clamshell lighting

clamshell-2

I saw a few medium format portraits yesterday that had a beautiful creamy depth of field to it, and I wanted to see if I could emulate it with my camera. I feel like I got close with this.

Here is the setup shot:

clamshell-1

Settings:
2 Canon 580ex II
Top flash at 1/32 power,
at 24mm,
into silver bounce umbrella
light stand was at 1.5 meters height,
directly in front of subject and angled down,
bottom flash at 1/64 power,
at 24mm,
through white shoot-through umbrella,
light stand at .3 meters height,
directly in front of subject angled up.

The lower flash was essentially 2 stops dimmer than the upper flash. It was dialed down one stop, plus the white umbrella eats an extra stop of light than the silver. The result is a very smooth lighting with a little direction from above. These low settings of 1/32 and 1/64 in a dark room allowed me to use f/1.8 which is how I got such a smooth and strong fall off of focus. I tried it with a background slave flash set, which illuminated the background, but that washed out the nice focus, so I turned it back off.

For post, I adjusted contrast slightly, and clarity slightly, desaturated a little. Then in Photoshop I added a +.3 exposure to just the eyes, and then used highpass and smart sharpen, but with masks to limit it to just the part of the image that was in focus, so that I wasn't sharpening the out of focus areas.

clamshell-3

Tuesday, October 7, 2008

Subtle Lighting Practice

subtle_practice-3

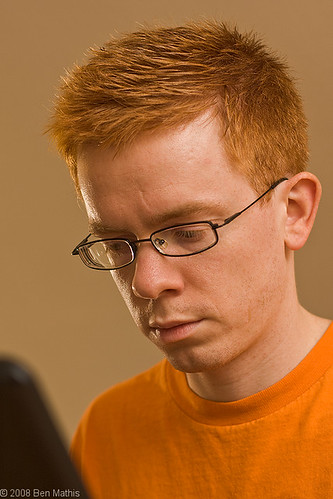
One problem in my work is that I sometimes overlight the scene, completely obliterating the existing light. This is fine in some situations, but I also want to be able to recreate more natural lighting, and avoid the "CG" look (computer generated). To try this, I used my excellent model, Agust, and setup around him while he was working on the computer. This way I could try many different setups without having to worry about the model becoming bored or wanting to leave.

First, I wanted to capture the existing lighting as best as possible. This was hard to do with the low light in the room. It required ISO 1600, 1/60 shutter speed, and f/1.8 Those settings are toeing the line of what my camera can do. Any slower shutter and I'd get blur, the lens can't open up wider, and the ISO doesn't go higher.

subtle_practice-2

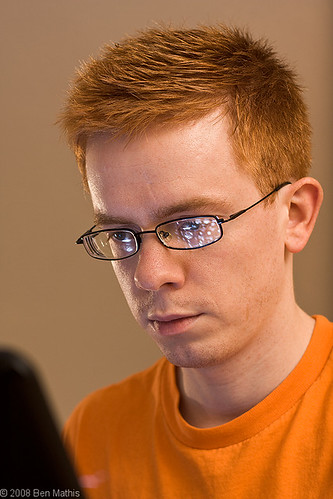
There is a very bright lamp to the left and behind the subject, creating the strong rim light. The laptop is throwing a bit of blue on his face, and the lamp is bouncing around the room off the white walls for the fill. It's an ok portrait, but I wanted a bit more control over the colors of the light, so that the main portion of the face could be more neutral, and I wanted to bring the camera settings up. I wanted a lower ISO for less noise, faster shutter to kill ambient and avoid any blur at all, and a slighly higher f-stop for a bit more of the face in focus.

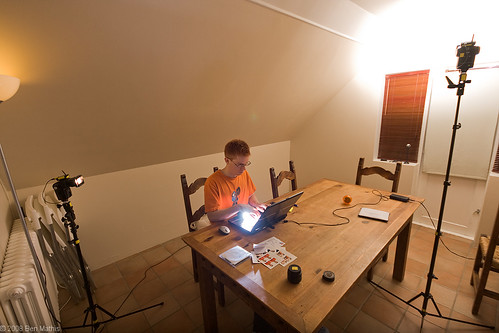
Here's the setup shot. Click through to see notes on the flashes.

subtle_practice-1

Settings:
2 Vivitar 285hv and one Morris slave
main flash at 1/16 power,
at telephoto zoom,
bounced off the wall and ceiling,
light stand was at 1.5 meters height,
2 meters to right of subject and even with camera,
rim light was at 1/1024 power,
through 3/4 CTOrange gel
at telephoto zoom,
.3 meters to subject left, and slightly behind,
at 1 meters in height,
Morris slave at 1/2 power,
through 1/2 CTBlue gel,
sitting on laptop and aimed at screen to bounce.

The first shot of the post has the morris slave turned off, which results in a more contrasty shadow of the face. However I wanted to try also with a bit of "blue glow" to emulate the screen. I was operating way too high above screen brightness for it to show up, which meant I needed to break out my slave flash. It's quite dim, and only has full and half power, but it worked great for this purpose. I put it on the laptop palm rest and aimed at the screen to get it to bounce. An unforseen, but added benefit, is the nice bright marks on his glasses, which is the flash bouncing off the icons of the screen. This final shot shows the same setup, but with the morris flash turned on.

subtle_practice-4

Saturday, September 27, 2008

Strobe on a boom

flash_on_a_boom-3

Originally this was going to be "Softbox on a boom" but the wind was way too strong, so I had to remove the softbox and go with a bare flash. I saw how nice the wet street looked, along with the warm sky, and I wanted to use a warm flash to push the blue street scene even bluer.

Here's the setup shot (we just both moved further into the scene).

flash_on_a_boom-2

Settings:
1 Vivitar 285hv
flash at 1/4 power,
at wide zoom,
through 3/4 CTOrange gel,
strobe was on a boom arm,
1 meter above subject, 1 meter in front and .5 meters to camera left of subject.

Here's the scene with no strobe:

flash_on_a_boom-1

Post settings were simple. I cooled the WB some to bring the flash a bit more neutral, while retaining some warmth. This pushed the street very cool. I did a quick adjustment brush for the sky, reduced exposure and upped the constrast, clarity, and saturation, as well as doing a slight warming overlay to make it pop a bit.

If I were to do it again, I would have moved Agust further into the shadows so that his head doesn't break the line of the roof. I'd also have put a flash outside camera right, with a blue gel, and a very low intensity (maybe 1:8 of the main) to give a slight rim light affect.

Monday, September 1, 2008

Moonlit portraits

moonlit_doorway-3

This doorway proved so interesting from the earlier shoot, that I got the urge to return after dark. I wanted to emulate the look of moonlight and a warm interior light.

Here's the setup shot. You can click through to flickr to see the notes over where the two lights are located.

moonlit_doorway-4

Settings:
2 Vivitar 285hv
main flash at 1/16 power,
at wide zoom,
through 1/4 CTBlue gel,
lightstand was at full 3 meter height,
exactly even with camera,
background flash was at 1/8 power (hacked vivitar),
wide tele zoom setting,
through 1/4 CTOrange gel,
light stand was at 1 meters height,
even with subject and 1 meter to the left (inside the alcove),
aimed up at the wall to bounce around as much as possible.

The goal was to emulate moonlight, so I gave the main flash a blue gel. In hindsight, I wish I would have put my silver umbrella on the stand, to make the light just a bit softer. Moonlight is normally a bit hard, but I think I could have gotten away with softening it a bit. If I'd had a third light, I would have snooted it, and put it slightly to camera left, and aimed just at his head. That way I'd have gotten a more even light on the face with less shadows. As it is, I did a quick adjustment brush over his face in lightroom, and boosted exposure a half stop, as well as contrast, clarity and sharpness.

The goal of the shoot in my mind was this shot below. I couldn't get any ambient to show up at f/5 and 1/60 of a second at iso 400, so this is entirely lit by the flashes. I started with him in the doorway, and adjusted the background light till it was proper brightness. Then I turned on the main flash, and it was fine at 1/16. I managed to get the light ratio fairly quickly, so the rest was getting the composition and pose that I wanted. This one hit all my mental expectations.

moonlit_doorway-1

Once I had the shot I was after, I started playing with angles and also switched to my telephoto lens (85mm) for the first shot of this post. I ended up getting my favorite shot of the shoot when I changed angles. This shot below was from getting much closer to the wall and angling up slightly. This is also the main one that makes me wish I'd had a third flash to add just a tiny bit of light to his face. If I'd had it, I probably would have made the blue of the "moon" flash a bit stronger, maybe 1/2 or 3/4 CTBlue. I would have placed the third flash almost even with the camera from this shot below, put it at full height, with a snoot, and a 1/8 CTBlue. This would have brought the focus of the shot to his face, and would have kept me from having to emulate it in post. It would also have evened out the lighting on his face, so that there isn't as much dark running down the center.

moonlit_doorway-2

After I was happy that I had enough shots, I asked Agust to swap with me, so that I could have one in the same setup.

moonlit_doorway-5

Sunday, August 31, 2008

Post processing

agust_frame

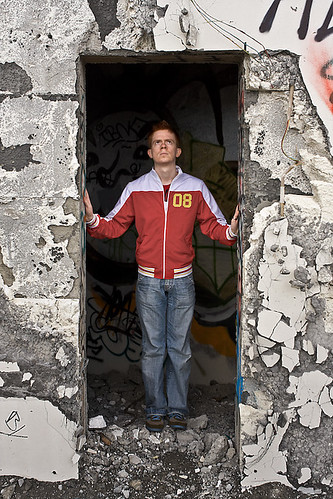
I took this today on our walk to work. I saw the awesome texture of the wall and the framing element of the empty doorway, and asked Agust to stand there. He decided to put his hands up on the frame, which actually improved the pose a lot. The lighting is all from an overcast sky.

I wanted to really play up the texture of the wall, so I used a lot of contrast, clarity, and sharpening on the wall texture. Here you can see the before and after:


And a gif flashing between the changes to better show them:


The main things I did, was to immediately boost the fill light a little to show more of the interior of the alcove. Then I desaturated just his jacket, as it was too attention grabbing. Next I imported to Photoshop, and used the liquify tool to adjust the shape of his silhouette to be more dynamic. I then lifted up to a new layer, his torso and legs. Then I transformed the top and bottom separately to lengthen his legs, while shortening his torso. Finally I used a smart sharpen to add even more contrast to the walls, and then masked it away from his face and the interior of the alcove (the alcove was getting too noisy with the last sharpening, and faces shouldn't be oversharpened).

I had to start with a photo that I liked to begin with, but post-processing really opens up some doorways to hit the vision you had in your head when you lifted the camera to your eye.

Monday, August 25, 2008

Gróto again

agust_wistful

Settings:
1 Vivitar 285hv
flash at 1/2 power,
through 1/4 CTOrange gel,
at normal telephoto zoom,
into silver umbrella,
light stand was at 2 meters height,
light was .5 meters to left and even with camera,
aimed directly at subject.

Whenever the sunset is looking nice, I am always tempted to run down with any available subject and do some portraits. This past Saturday I gave in to the temptation and raced down. It was quite windy, so I was limited in where I could place the umbrella. I had my left arm straight out, holding the light stand. I gelled the flash slightly, so that in post, I could adjust the WB to be a bit bluer, but still retain a warm look to the subject. I started at my max sync speed of 1/250, got my flash settings right for the subject (I started at 1/4, but had to bump up to 1/2), then I lowered the shutter till the background was the brightness I wanted.

I sat Agust in such a position to put him in line with the leading lines of the telephone poles. This would compositionally balance the image and give something else to look at in the background, at a place of power. Unfortunately it left grass in the scene. Originally it was very bright, yellow, and distracting. I just used Lightroom 2's new adjustment brush to quickly darken, green-ify, and reduce contrast, so that it could be there as another layer of foreground, but not be as distracting. I also added green to the sky, pinked up the sun poking through, and made a mask for Agust's face. I used that mask to de-saturate a little, bump exposure, contrast, clarity, and sharpness. I do that often now on faces to make sure they are the most clear and attention drawing element of the scene.

Sunday, August 24, 2008

Overhead light part 2

agust_overhead-7

I wanted to try the same light setup, but with a softer overhead light. I don't like the affect as much, but it's soft, while being directional, so I'll keep it in mind for future shoots where it might be more appropriate.

Setup shot:
agust_overhead-10

Settings:
2 Vivitar 285hv + morris slave flash
Overhead light at full power with morris slave velcroed to top,
at wide telephoto setting,
into silver umbrella with white diffuser,
light stand was at 2 meters height,
light was .3 meters in front of subject and directly above,
aimed directly down at face,
underlight at 1/128 power (hacked vivitar),
through 1/4 CTBlue gel,
at telephoto zoom setting,
light stand was at minimum height of .5 meters,
dead center of frame, aimed up at face.

The dead overhead direction gives it a definite harsh feel, even though the light is extremely soft. I changed to a blue gel, and one of less saturation, because I felt the coolness of the blue would match the softness of the main light better, and I want to start using less saturated gels for more subtle affect.

One more, with a less serious expression:

agust_overhead-8

Friday, August 22, 2008

Overhead light

agust_overhead-3

In 3D (my original artistic passion) lots of lighting is done in this style. Overhead light of perfectly neutral color, and strongly colored underlight to define volume and show areas in shadow without overcoming the contrast of the main light. I wanted to try it with a real person.

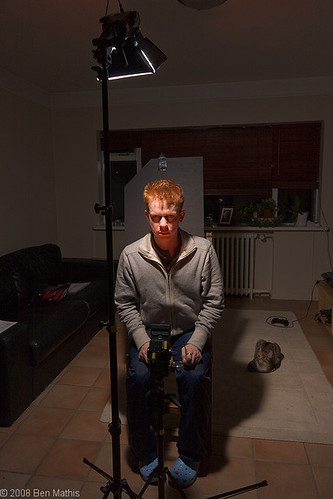
Setup shot:
agust_overhead-6

Settings:
2 Vivitar 285hv
Overhead light at 1/4 power,
at normal telephoto setting,
into tiny softbox,
light stand was at 2 meters height,
light was .5 meters in front of subject and just barely out of frame left,
aimed directly down at face,
underlight at 1/64 power (hacked vivitar),
through sunset red and 1/4 CTOrange gel,
at telephoto zoom setting,
light stand was at minimum height of .5 meters,
dead center of frame, aimed up at face.

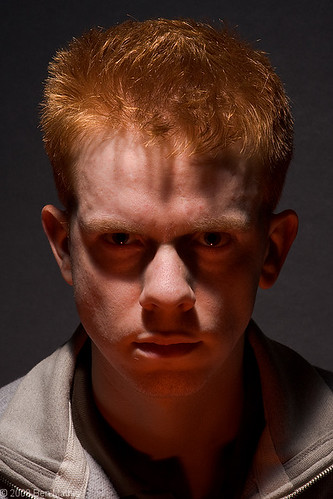
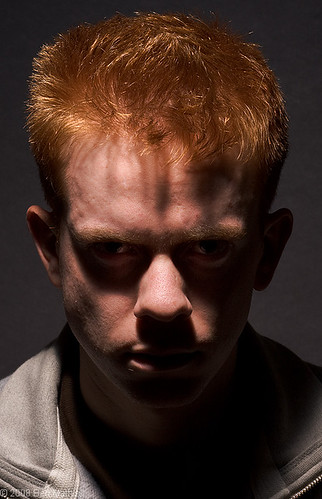
I took one with just the overhead light to make sure I was getting it the way I wanted. I could have put the light on my boom arm to get it perfectly overhead, but I liked the way the slight asymmetry fell on the face, mainly because it illuminated one ear while leaving the other in shadow, and it revealed a bit of cheekbone. I also used a shutter speed of 1/200 and aperture of f/11 to kill the ambient, giving me black shadows. The softbox widened the light a bit, so that it wasn't as harsh as a barebulb.

I asked Agust to lean forward and to "glower" at me, in order to have his head pose and facial features match the theme of this lighting. It's a dark, contrasty, and fairly unflattering lighting setup, so it's only useful for graphical applications, not really as a portrait.

agust_overhead-4

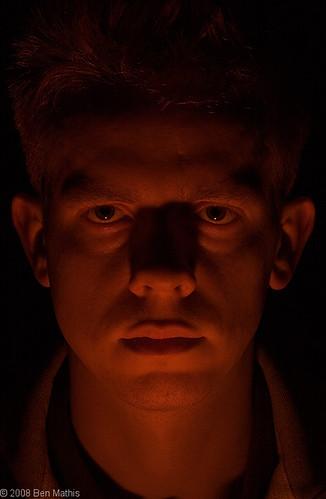
Then I turned off the overhead light, and started messing with the underlight. I wanted it to be dark, but visible. I left my camera settings alone. This gave me a chance to see if the light was the color I wanted (I guessed right with my gels), and to ensure it was the right ratio (by leaving my camera settings alone, I know how bright the main light will be. I just need to adjust this light to fit). I started at my lowest setting (below 1/1024, unsure of the exact amount) and saw it was way too dim. I upped the flash power 2 stops, still too dark, 2 more stops, good to go. I kept this light perfectly centered. First because it was easy, since it was below. No stand to get in the way. And second because I wanted the nose shadow to be aligned, so as not to block the eyes at all.

agust_overhead-2

Once I had the underlight and main light ratio set, I turned the main light back on, and started trying to get my final shots. it was just a matter of evoking the right expression from the subject, and making sure I liked the image on the LCD after. The setup and ratio figuring took about 5-10 minutes, getting the final shots took less than 2. One thing that helped, is that after I got one or two good ones, I showed it to Agust. This gives him an idea of the look I'm going for, and he can adjust mentally to emote appropriately.

agust_overhead-5

Saturday, August 16, 2008

More natural light

summer_vacation-37

While on vacation, I infrequently bothered with my flash equipment. I was always on the look out for nice lighting for a portrait session. The above photo was one such time. The setting sun to the right provided a nice orange colored fill light on the right side of his face, and the soft cloudy sky provided a blueish rim light on the left side of his face. I just had to figure out a good rotation of the subject, and then my placement in relation, to best take advantage of the lighting. I normally hold up my hand, and rotate around it till I see the lighting hitting my hand in the way I would want it to hit a face. (the light, not my hand)

In this case I thought the setting sunlight was a more flattering shade, so I used it as the fill, and rotated Agust until it hit a good portion of his face. I then moved from left to right, to get the angle of him that I wanted. It was fast and painless, but a very nice soft light, with good color contrast.

summer_vacation-33

Here is another example of a naturally occurring flattering portrait light. This is a mausoleum in Hollywood Cemetery (Richmond, Virginia). There is a door behind the camera, of the same size and shape of the far door you can see behind me in the photo. This let's in a nice directional, soft light, but the darkness of the interior kills the rest of the light. This way you get lit surfaces facing the window, and dark shadows on surfaces facing away. You can see the shadow from the mausoleum walls on the right side of my face. In addition to the lighting, the dark walls with bright window provide a framing element to bring the eye to the subject's face. Good environmental portraiture will have interesting elements surrounding the subject, but they won't steal focus from the main attraction.

Look for directional natural light sources for flattering portraits. Look for framing elements. Look for contrasting colors in your light sources. When you search for good natural light, it can give ideas for cooking your own lighting setups later.

More found light portraits:
summer_vacation-32 summer_vacation-15 summer_vacation-19

Thursday, August 14, 2008

Sunset with small softbox

agust_sunset

Settings:
1 Vivitar 285hv
set to 1/16 power,
at telephoto zoom setting,
through Lumiquest softbox II,
light stand was at 2 meters height,
light was even with camera, and just outside frame right,
aimed directly at subject's face.

Sunset photos are easy and produce very pleasing results. This portrait, while not all that exciting, demonstrates the use of the small softbox when moved in close. I feel from this example that the small softbox is a bit too harsh still to produce a good main light, if the ambient is too dark (like in this example) However I like the falloff it produces. If I were to do this shot again, I'd most likely use my silver umbrella, and block off the bottom portion to get the same falloff. However as a softer than barebulb fill, or in a lighting situation where there is more ambient, this light-mod will work well.

There was a much hotter specular on his forehead and cheeks, but I reduced it in photoshop by "select by color" using white, and reducing the feathering till I only had the highlights. Then I used levels to reduce the brightness, giving it a softer look. I opened up the shadows with the fill light slider in lightroom. Before these two adjustments, the lighting on the face was more severe, and less flattering.

Saturday, August 2, 2008

Beach portraits

beach_portraits-5

This past few weeks I've been in the US, specifically to the Outer Banks in North Carolina. I took my camera and lighting gear with me, and managed not to take any scenery photos, but lots of portraits. I loved how the fading sun gave me lots of interesting texture in the clouds, and we had a wrap around porch on the 3rd floor, which gave me a vantage point to get plenty of sky and a bit of beach houses.

I wanted to do some full body portraits, showing the beach setting, the cloudy sky, and provide a bit of falloff to the light so that everything wasn't lit evenly. It was also just a chance to experiment more with lighting and using my new flash equipment (Honl honeycomb grid).

Settings:
2 Vivitar 285hv
Main set to full power,
at telephoto zoom setting (to keep the light only on the subject)
Rim set to 1/4 power,
through 1/2 CTBlue gel,
through Dave-Honl 1/8" grid-spot,
Full zoom setting
Main light stand was at 2.5 meters height, rim was set on the balcony rail (about 1.2 meters high)
Main light was even with camera to the left of the subject, just outside of the frame
Rim was even with subject, 2 meters to the right of subject,
Rim light was aimed at his head, main light aimed directly at the subject.

Click through this setup shot to see notes over the flash heads.

beach_portraits-6

I started originally with a sunset red gel over the flash, but it proved to be too strong, so I removed it. In hindsight, I wish I'd put on a 1/4 CTOrange gel on the main flash to warm everything a bit. Notice how in the setup shot, you can see how using the telephoto setting keeps the light only on the subject and feathers nicely off into the wooden balcony? I like the setting, but next time I'll aim up a bit more so that it feathers his body a bit. On all the subjects, the lower body received too much flash and removed focus from the face. Aiming the flash up a bit would give me more natural feathering of the light.

One thing I really liked was the Honl Honeycomb grid. I'm not a fanatic about keeping my strobe clean from velcro, so I forewent the speed strap, and just attached two velcro strips to my flash head. This cut down on the cost of the grid. The grid allows me to keep the light in a very tight, laser beam like area. In these portraits it was used to keep the 1/4 powered blue fill on just the face. Click through to the larger version to see it in detail.

beach_portraits-7

This shoot however has convinced me that I need a small softbox for when I want to soften the light just a bit, or for times when an umbrella would blow over for sure (a real problem in Iceland where it's always windy).

Full beach portrait set
A few more examples:

thug_sarah peetree

My next post will show my new DIY umbrella mod. I'm building a white diffuser for my silver bounce umbrella. It's inspired by the 60" softliter that I purchased. The softliter is far too heavy and bulky for my taste, so it sits back in the states in my dad's lighting kit. The best part about it was the flat white surface. It's the best of both a silver and white umbrella.

Also, a request. Will anyone who knows of a university that teaches all in English, has a 3d art and photography degree, and is not located in the US, or the UK, please contact me via email?